
|
|
|
|||||||
| Register | Album Gallery | Thread Gallery | FAQ | Members List | Calendar | Become a Paid Member | Search | Today's Posts | Mark Forums Read |


|
|
|
Thread Tools | Display Modes |
|
#81
 02-07-2018, 04:05 PM
|
|||
|
|||
|
Jason, I am going to learning how to paint on my old truck under an open-air car port where temp control is not possible. Can you give me some input on painting when temps vary?
The car port will be shoddily sealed with thick plastic wrap, and I might use some plywood to make fake walls....maybe. I am obviously not a pro, am not going to get fantastic results...this I realize. Thank you very much.
__________________
--Nick 
|
|
#82
02-07-2018, 05:06 PM
|
|||
|
|||
|
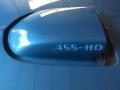
Well I'm not a pro just a hobbyist in my eyes. You have multiple variables against you right away. The temperature plays a key factor on what materials you purchase. Reducers have a temperature range usually 10 -15 degrees. If the outside temperature is going to vary that much you will have issues. As for the open car port ventilation is very important and not to mention bugs dirt and dust. I would talk to your local auto body supply store and ask them what reducers and paint would they recommend for your situation. I'm here to tell you paint supplies are very expensive and to just practice with them in these conditions would be wasting your money. I'm all for trying things on your own but you will be learning the hard way for sure at a very hefty price. For a very inexpensive base coat, clear and hardeners I bet you will have at least 500.00 in color and clear. When you go with inexpensive base coats usually it takes twice the amount of paint to cover. What you are looking at in the pictures I posted is one of the best clears PPG produces and high end PPG base coat DBC. For clear and base coat for this car it cost just shy of 2300 dollars. That's my cost with a discount. Retail its just shy of 3K.
With all that being said and your still willing to go this route have at it. There's no better job satisfaction than doing it yourself. The question you need to ask your self is what are my expectations of the final result.
__________________
Looking for the next project.
|
|
#83
02-08-2018, 04:15 AM
|
|||
|
|||
|
Thanks for letting me use your thread to bounce questions around in.
I really think my first line of business should be to find a way to create a cleaner and ventilated environment first. Secondly I'll need to plan for doing this at one time, instead of trying to do it over multiple days where the temp/humidity can vary. Thanks again Jason!
__________________
--Nick
|
|
#84
02-08-2018, 02:24 PM
|
|||
|
|||
|
----I have a number of friends that are able to rent a booth from someone they know. Get all the prep work done 1st. Maybe that's a possibility?......Bill S
|
|
#85
03-23-2018, 10:55 AM
|
|||
|
|||
|
Headliner is in, doors are hung. Just received the motor from the machine shop last night. Picked up the transmission this past weekend, everything is starting to come together. Also ordered a complete glass kit that should be in next week.
__________________
Looking for the next project.
|
|
#86
04-09-2018, 03:04 AM
|
|||
|
|||
|
The motor has been installed. The owner wanted aluminum heads. Little did he know the edelbrock heads must be a little wider because both headers needed modifications to fit. First problem was on the driver side. The header was hitting the brake line distribution block. I had to move it back and up to get it away from the heat of the header. Next was the Zbar its going to be real close wont know until I get the pedals back into the car and engage the clutch. The passenger side header had to be dimpled where the lower control arm bolt head is. These Doug headers are a tight fit this for sure!
__________________
Looking for the next project.
|
|
#87
04-09-2018, 09:47 PM
|
||||
|
||||
|
Are those headers designed for the Edelbrock heads? Those heads have their own unique port layouts from what I recall.
|
| The Following User Says Thank You to njsteve For This Useful Post: | ||
x44d80 (05-30-2018) | ||
|
#88
04-10-2018, 01:00 AM
|
|||
|
|||
|
Yes these are the correct Dougs headers for these heads. Some special D port head I guess. All I know is everything is tight.
__________________
Looking for the next project.
|
|
#89
04-12-2018, 03:59 PM
|
|||
|
|||
|
How does the radiator sit in the core support for a 70 GTO? I can't remember if there were tabs off the core support that the radiator sits in? All I have are some rubber bushings. Also how does it attach at the top? With a panel? I've tried searching on the internet to see if I can find some pictures but I'm coming up empty handed.
__________________
Looking for the next project.
|
|
#90
04-13-2018, 12:49 AM
|
|||
|
|||
|
The radiator fits into the shroud and then the shroud is bolted to the core support.
|
|
| Thread Tools | |
| Display Modes | |
|
|


 Linear Mode

