More from the build:
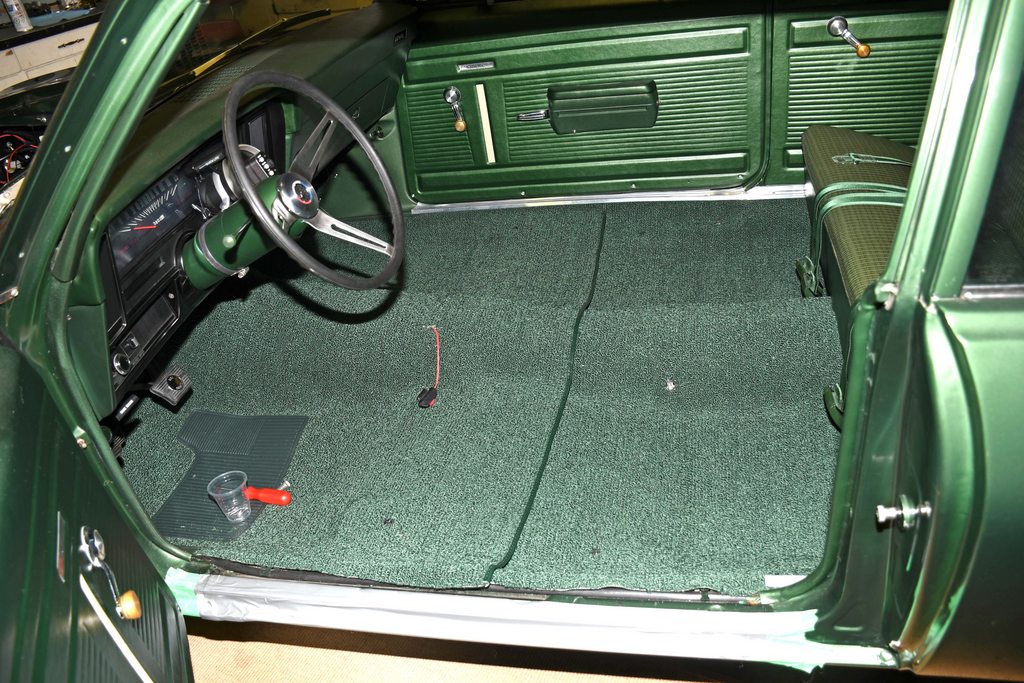
I really don't care for rubber floor mats in cars. Just don't like the look or feel, plus it seems to me they have more of a tendency to trap condensation when compared to carpet (my opinion only!). So I decided to sell the mat from Plain Jane and replace it with carpet. I had to buy two different carpet sets. I had pretty good luck with a previous OER carpet set, so I bought another. Mistake! It fit like crap. And it looked worse. The tunnel area was triple XL. I took it out and replaced it with a set from ACC. The product was great. Ditto with the fit. That duct tape you see on the door sill is to protect the paint while the bench seat is wrestled out and back in:
Next up, it was time to get working on the engine. Unfortunately, a huge number of the parts I needed were "supply chain issue" back ordered. It took the better part of a year to acquire a Dart cylinder block. What to do? I decided to use a mock up block and fit as many accessory pieces as possible. Turned out to be a really good plan. Here's the mockup block in the car:

You might notice in some of the pix that I used a conventional motor mount on the passenger side. On the driver side, I use a solid mount. This does the same thing as a turn buckle, but without the drama. The solid mount I use is from Moroso (and don't believe their catalog for fit either...I went through a couple of different sets in order to get the right ones):

I installed the heads and an intake on the mockup block. It sure looked like the Weiand intake I had would work. I later found out it didn't quite clear the flat hood, but that's another story.

Here's another look. I plumbed the mechanical pump (shown here), but that too has changed.

Using a mockup allowed me to check for valve cover to wiper motor clearance. I also used the mockup to figure out which throttle cable to use. Since the Nova was originally a six, it had a cable instead of a lever (that's the six banger cable shown here). Although I do have a complete lever style mechanical throttle assembly it made more sense to use a cable. IIRC, a Chevelle cable worked.

This is the oil filler cap I'm using on the cast valve cover. It's a knurled screw-in job sealed with an o-ring. The valve covers are actually for a marine application.

I don't use a PCV on the engine. Instead, I use two large K&N breathers. These circle track style "socks" are used to soak up any oil that happens to get by the billet baffles in the valve covers:

I test fit the ignition wire divider stands at the same time:

With the mockup engine out of the car, it was time to fit the ignition wires. The valve covers were powder coated black. One change I made later was to reverse the valve covers because the breather on the driver side can interfere with valve cover removal (it hits the wiper motor). FYI, the water pump is an Edelbrock "long" version.

I ended up with custom 2.25-inch primary tube headers from Lemon's Headers. I initially tried a set of Hooker adjustable, but because of the raised exhaust ports in the Brodix BB3 X'tra heads, they just didn't fit. The Lemon's headers were super costly, but they fit nicely. Eventually, I had them Cera-coated semi-flat black (Jane is pretty much allergic to shiny stuff ....L-O-L and the gun finish works great)

Here's the collector and reducer I'm using. I had a v-band clamp setup TIG welded to the slip on reducer. Not shown...when using a slip-on reducer, I always pin it to the collector. Just a wee bit of insurance. By the way, that's a four-inch diameter collector.

This is a side view of the wires, as I was making them up. The wires consist of Summit Racing race wire (which is actually high end Delphi race wire). The sleeves and shrinks are from MSD. The boots and terminals are Delphi (again Summit branded).

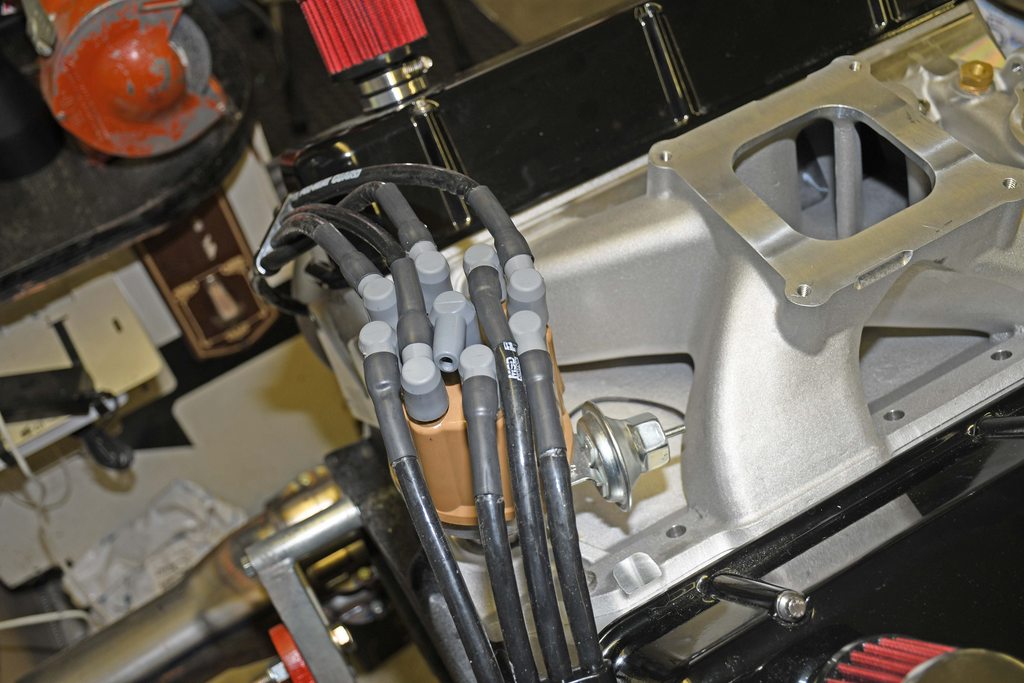
Here's a look at the topside. That's a heavily reworked Delco point triggered distributor, complete with a modified vacuum advance. Down the road I'll show you what's inside. It's crowded up there with the fat wires and sleeves, but it all works:
I tested each wire after it was stripped and then after it was terminated. Testing them before hand tells you in a heartbeat if you made a secure crimp!

That's all for now...I'll gather more pix in a few days...