After driving the Nova for a bit and discovering it had some issues (brakes weren't stellar and the acceleration wasn't exactly awe-inspiring...L-O-L), I decided it was time to get started. This is a photo of it in my old garage on the west coast:

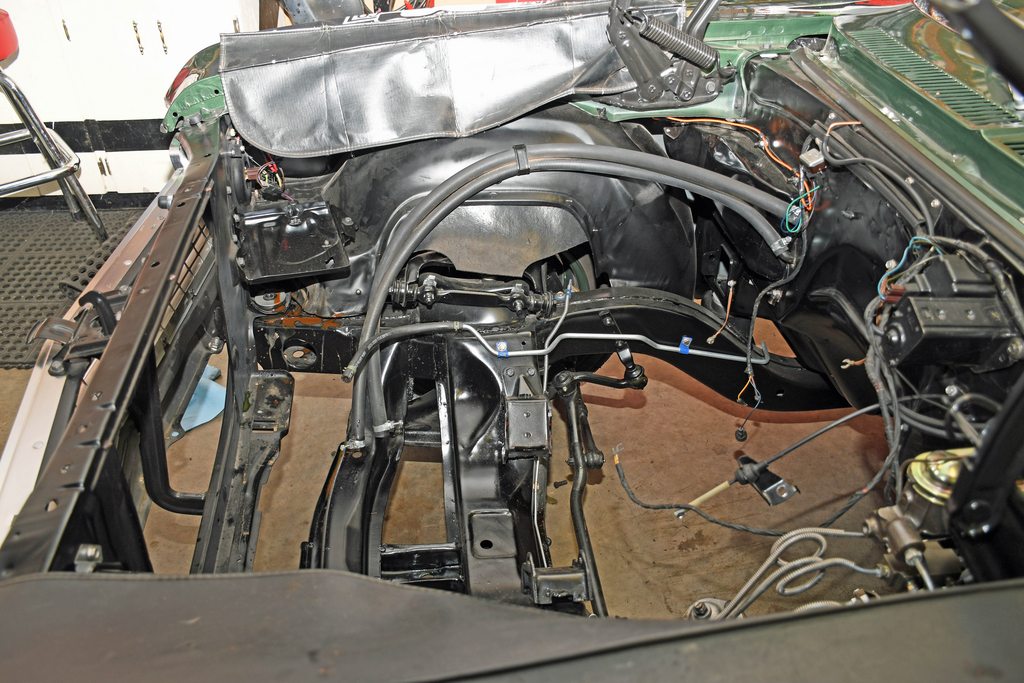
This is what the bones were like from the engine compartment side. The undercarriage was and is the same -- clean and nicely painted. Everything was painted individually, including the fasteners.
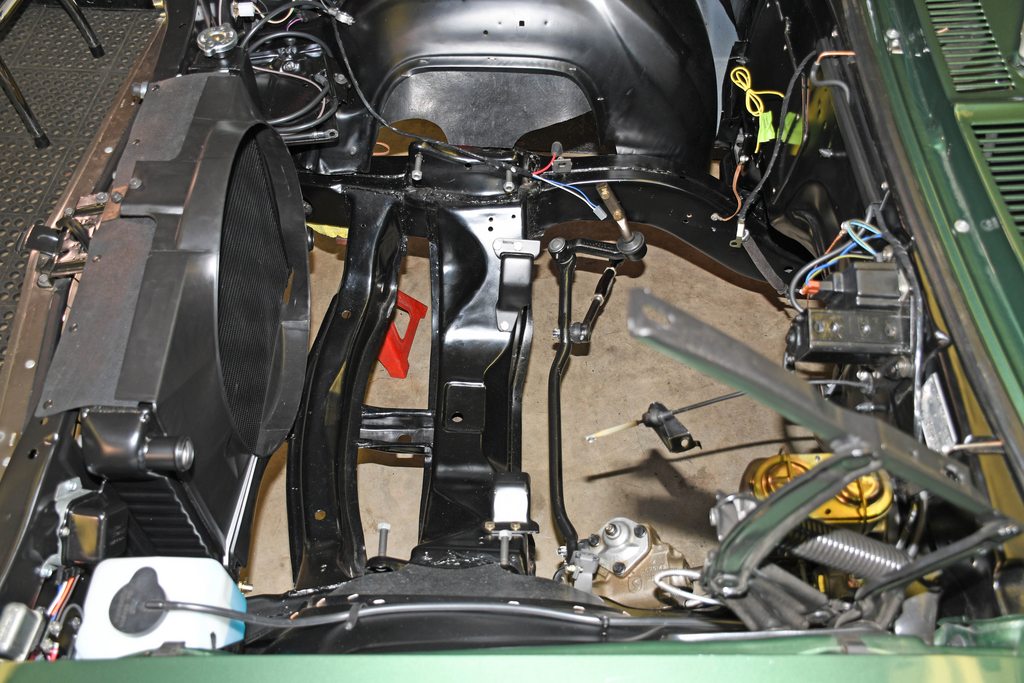
I pointed out in the original "just finished this" post that the rad support is a reproduction. It needed one extra hole drilled, but otherwise fit like a glove. In order to get the support in, much of the front end had to come off, along with the inner fenders. That gave me the opportunity to replace all of the freshly painted hardware with more correct phosphate plated hardware. Here are two photos of the DeWitts "black ice" aluminum rad I selected. It's an awesome high quality piece.


While the front end was apart, I replaced the subframe and rad support bushings with these slick pieces from Detroit Speed (I also used their optional ARP stainless fasteners):

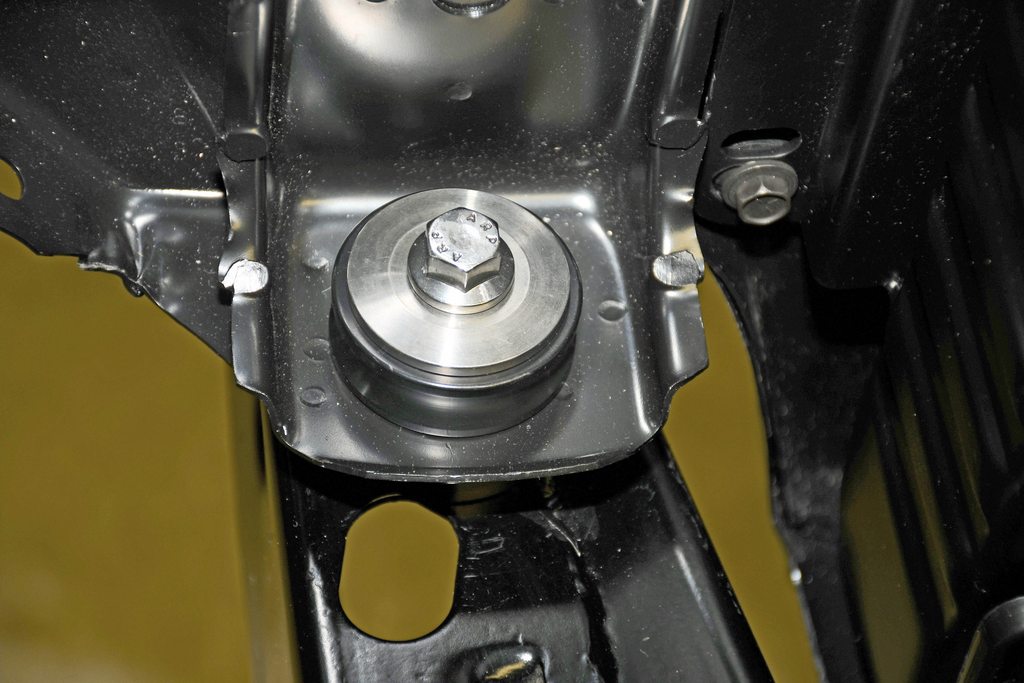
The frame mounts were swapped out for correct big block examples. I use AN (aircraft) fasteners where possible.

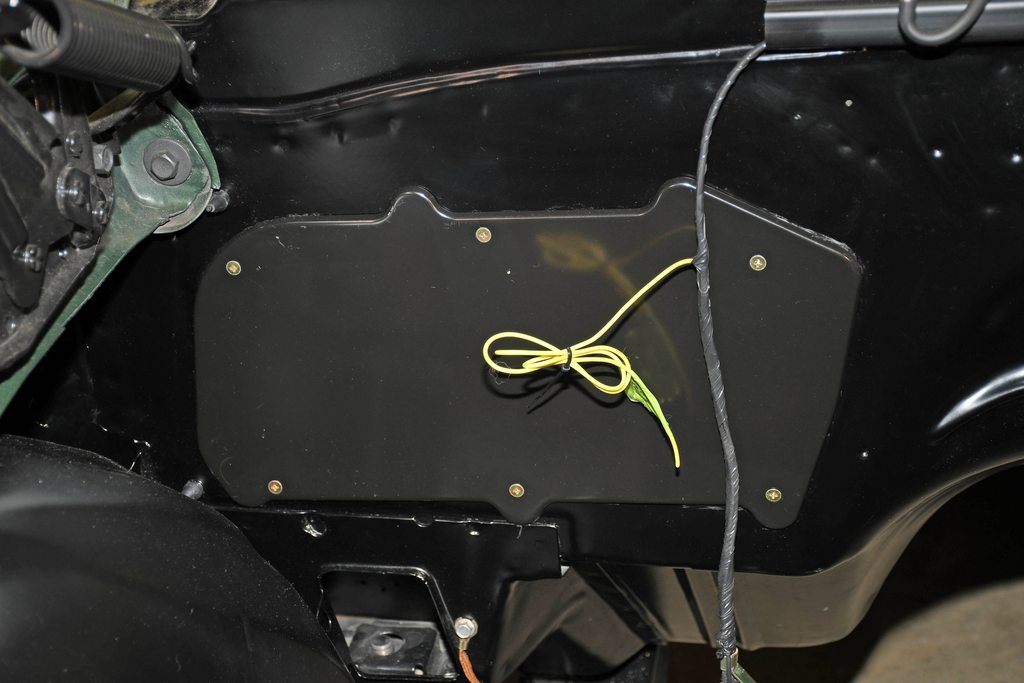
I removed the heater assembly and replaced it with a correct delete plate. I also used AN fasteners to mount it. The flash shows a color difference between the plate and the firewall, but in normal lighting you can't see the difference. That's a new gutter without the transmission control spark. I stripped a new wire harness back to remove all of the wiring.
With the big block rad support, I also included a complete OE-style big block rad mount and shroud arrangement. I had to drill holes for the rubber flap clips but that's about it. Note the bump starter switch. I put them in all of my modified cars, because it makes setting the valves a whole bunch easier.
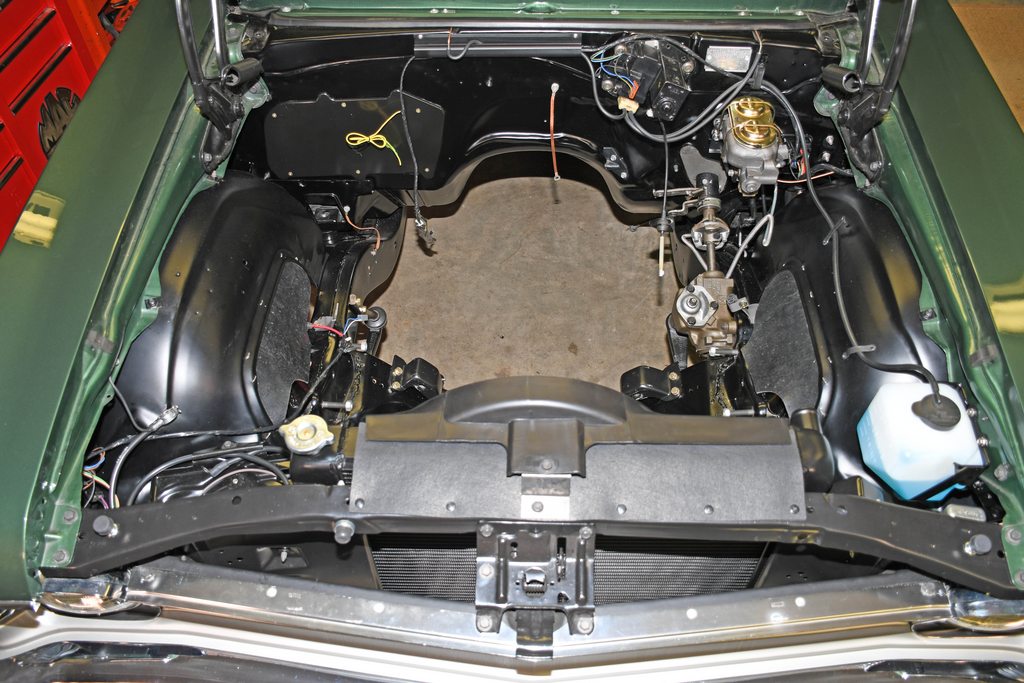
Both the ignition and forward wiring harness assemblies were replaced. I also added a set of big block battery cables and a new battery tray. You'll note the wiring harness isn't looped alongside the windshield washer hose. In past builds I've routed the harness out of the way, over the inner fender. I did the same here. I replaced the master cylinder with one for 1969 disc brake Camaro. I might have pictures of the front brakes I can show later, but I used two piece made-in-USA rotors.
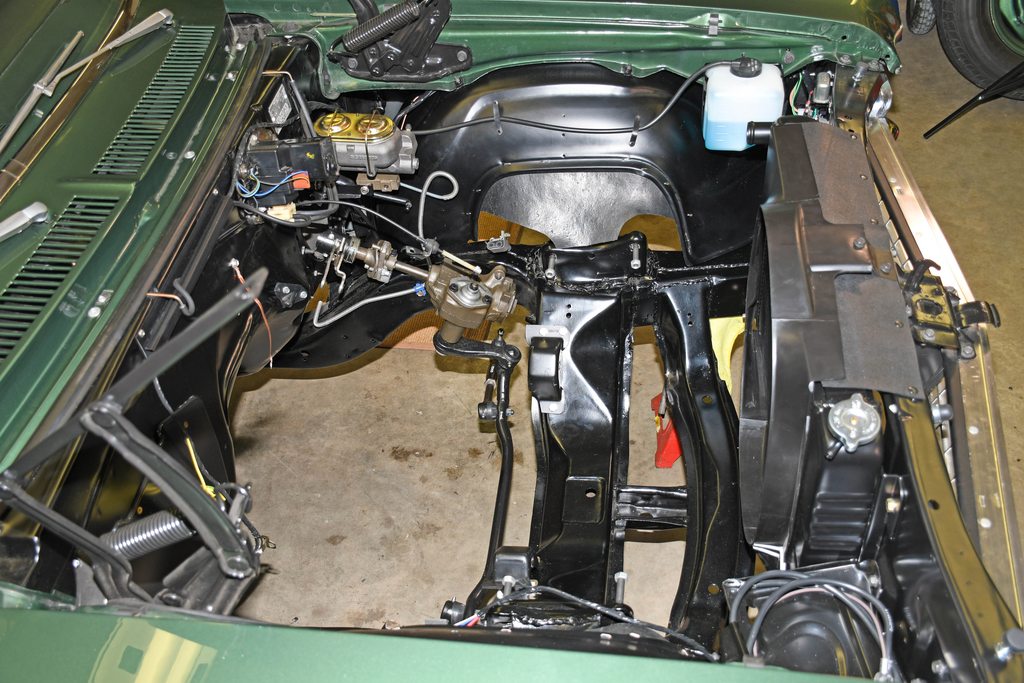
This is another look at the engine compartment. I replaced the tie rod sleeves with Hotchkiss billet jobs. The tie rod ends and the idler were replaced. The AN bolts are in "backwards" on the idler arm. I do this to save my skin when working on the car...L-O-L. It's getting closer, but still a bit away from being done...L-O-L:
Here's a link to a 4 minute video on my progress to this point. You'll get more build details in the video:
https://youtu.be/LEG7I-MOwio
Til next time!