
Dedicated to the Promotion and Preservation of American Muscle Cars, Dealer built Supercars and COPO cars. |
|
|||||||
| Register | Album Gallery | Thread Gallery | FAQ | Members List | Calendar | Become a Paid Member | Search | Today's Posts | Mark Forums Read |


|
|
|
Thread Tools | Display Modes |
|
#11
 07-31-2015, 01:28 PM
|
||||
|
||||
|
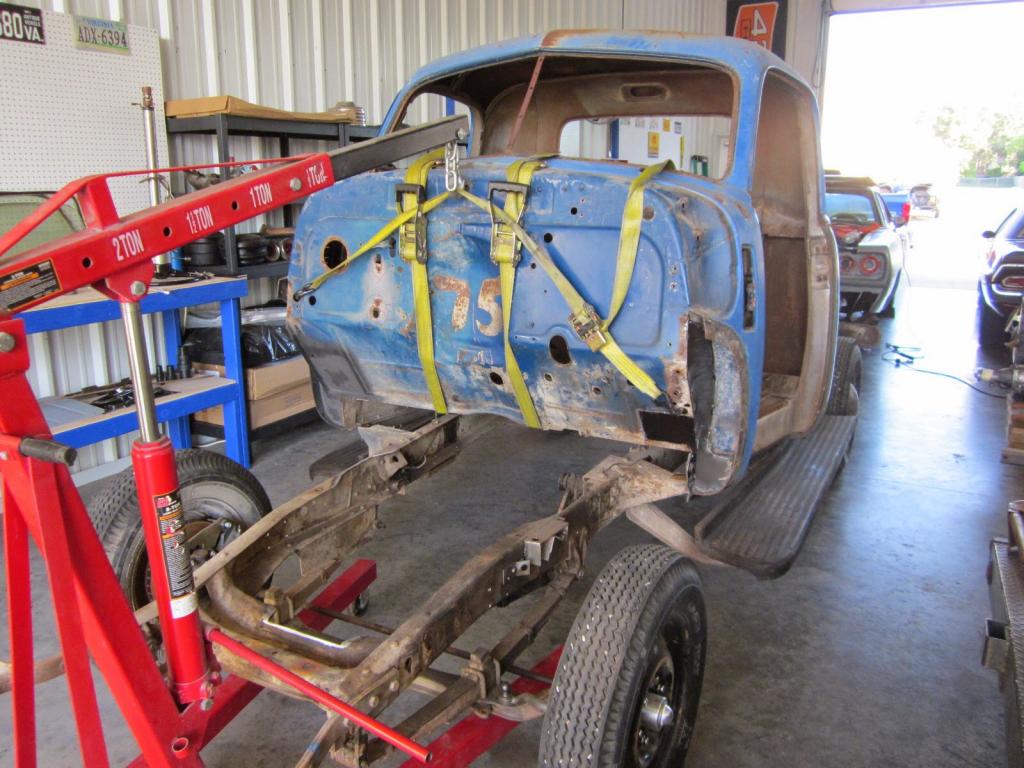
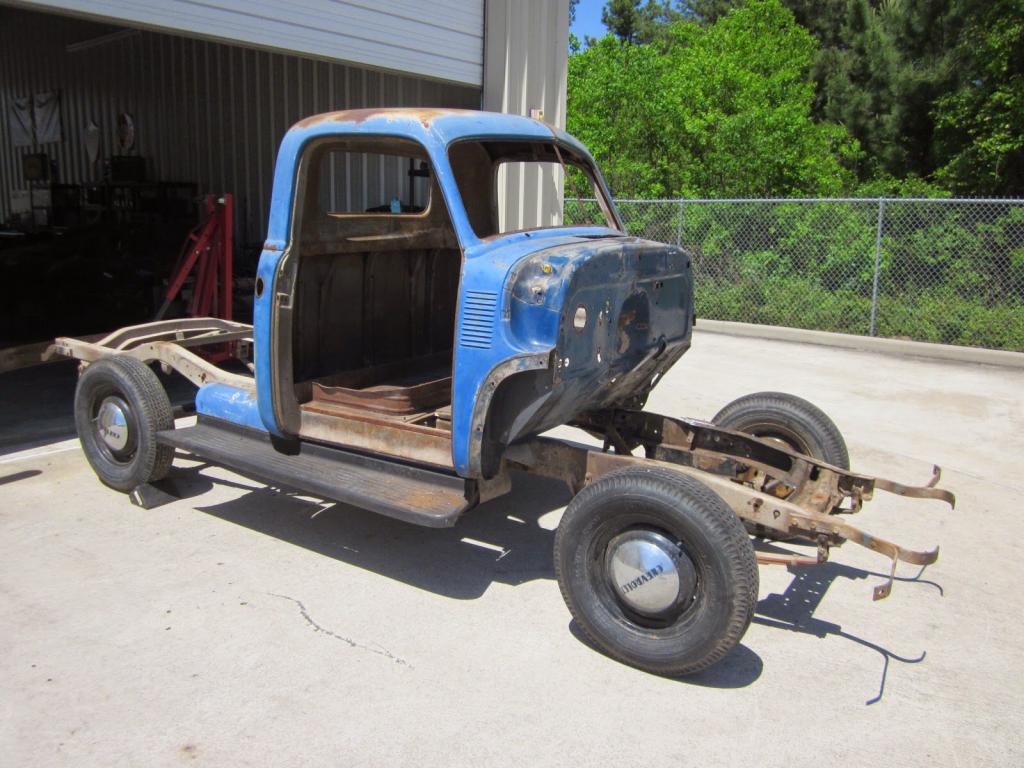
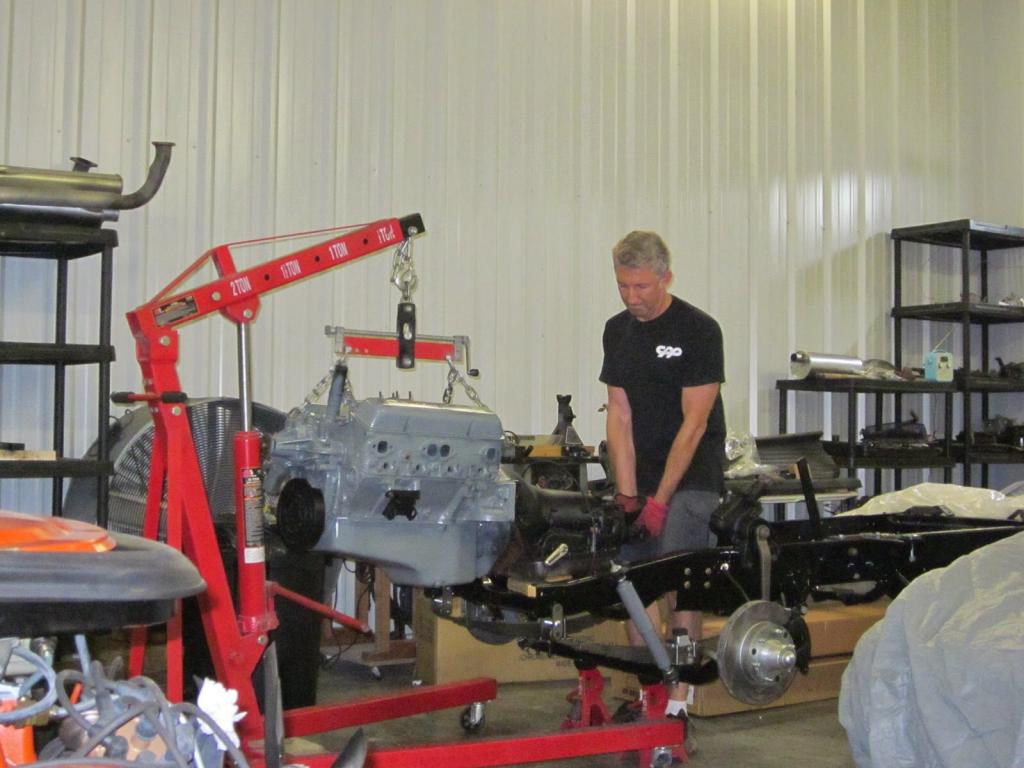
Here's that coworker of mine in action. THe good part? I don't have to pay him any benefits....no 401K to fund....and he'll stand there and not move for hours just a holdin' whatever up for me! [img]<<GRAEMLIN_URL>>/grin.gif[/img] With the body off the frame, off to the blaster it goes to remove the last of the cow poop. Once it was back, two coats of John Deere gloss black heavy duty tractor paint. It's getting there.....

|
|
#12
07-31-2015, 01:31 PM
|
||||
|
||||
|
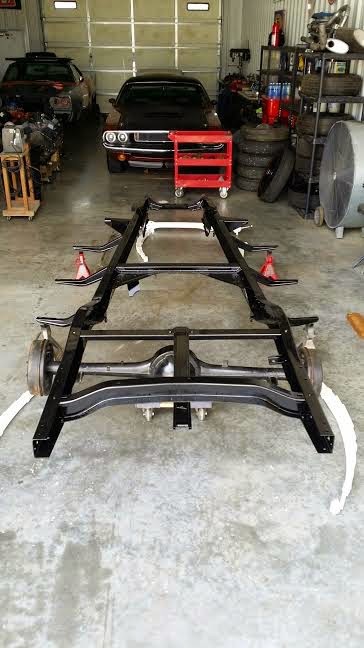
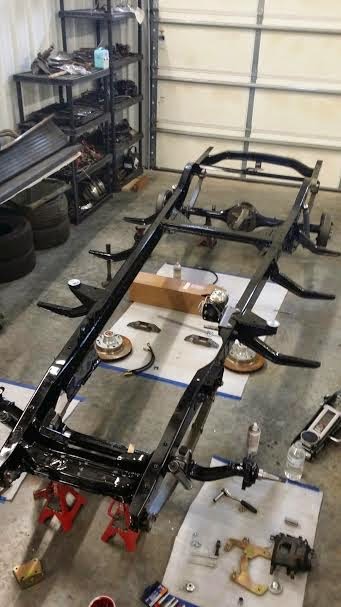
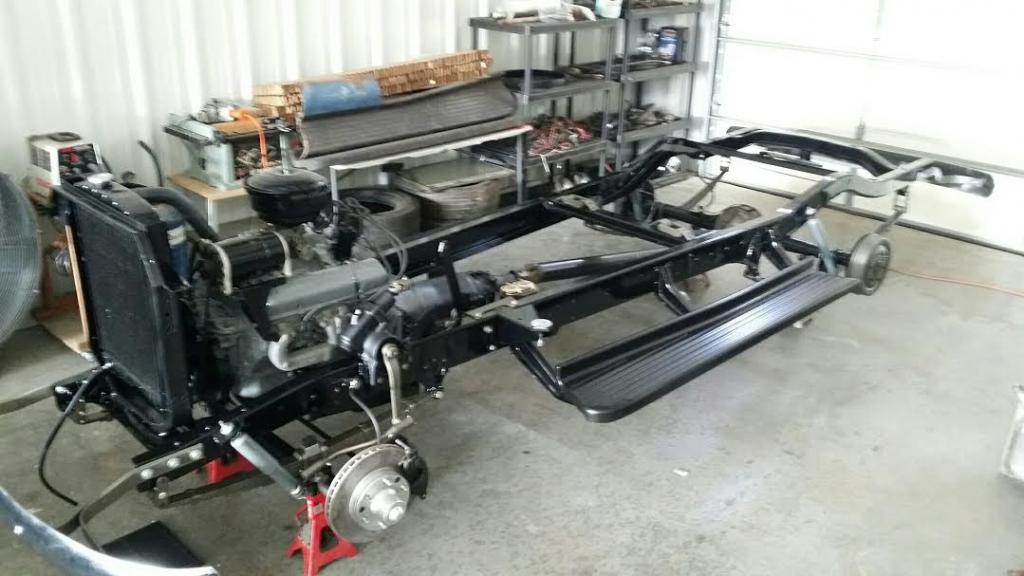
I blasted the springs, reinstalled liners, added the tube shocks, detailed up the front end parts, reinstalled the engine (thanks coworker!), and the chassis is just about there.
|
|
#13
07-31-2015, 01:42 PM
|
||||
|
||||
|
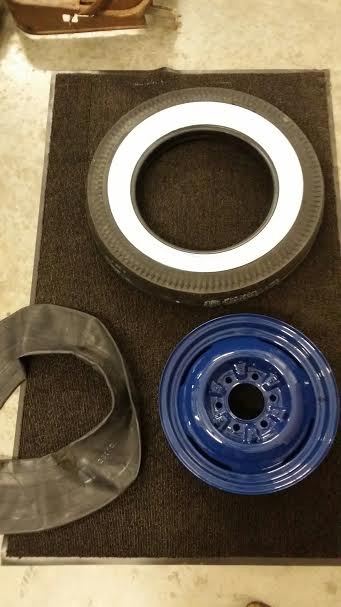
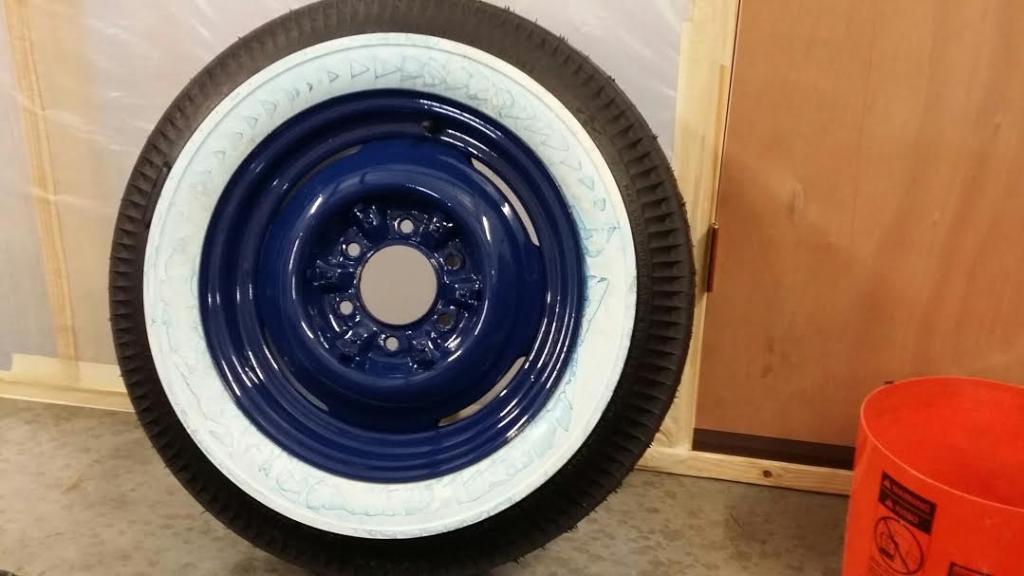
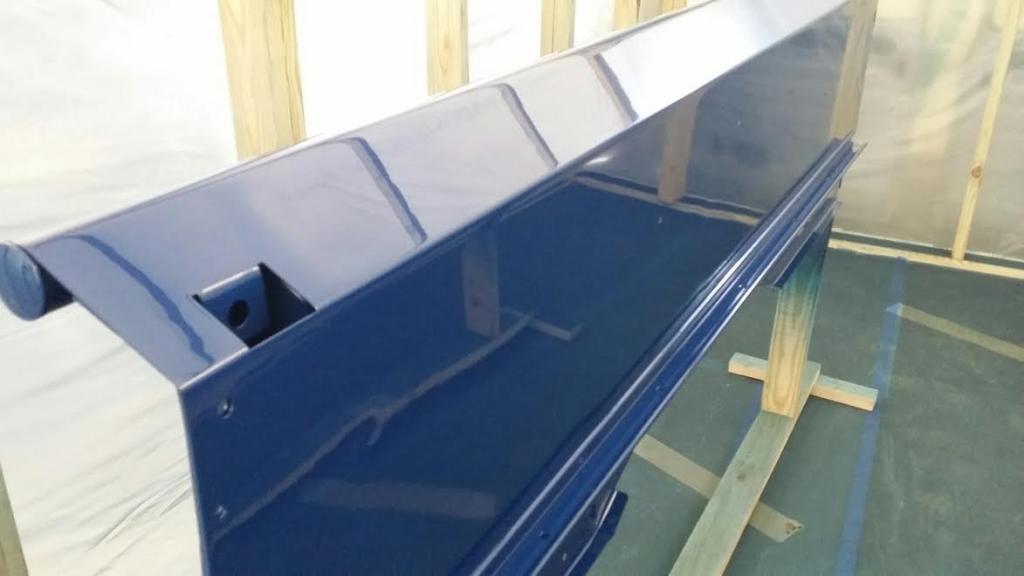
Finally!! PAINT!!!! This is the factory color of my truck, Mariner Blue. It's a really nice color and changes with light. Sometimes it apppears lighter, and other times dark, almost black. Really a sharp color and it reminds me of a Ford color called Washington Blue that I've always loved. So with the wheels painted I thought I'd give it a whirl at mouting the tires with tubes myself. I know! At the time, that seemed like a good idea, but after the first one and a visit to the hospital (well, two..I don't remember the first one) I thought maybe I should let the pros handle it. But nothing ventured, nothing gained!!!! It's actually not very hard to do. Here's how I do'ed it. (Insert very southern accent here): Git you a tube, a tire, and a freshly painted reum. Shove that whaeel down in that there tire, then use them fingers and shove that tube inside. Now, take yer tire iron and scrape up that nice fresh paint, scuff yer fresh white wall, and right when there's all the tension on that tire iron, let it slip back and smack you in the snotter. Then crack you open a beer for a job well done!
|
|
#14
07-31-2015, 02:00 PM
|
||||
|
||||
|
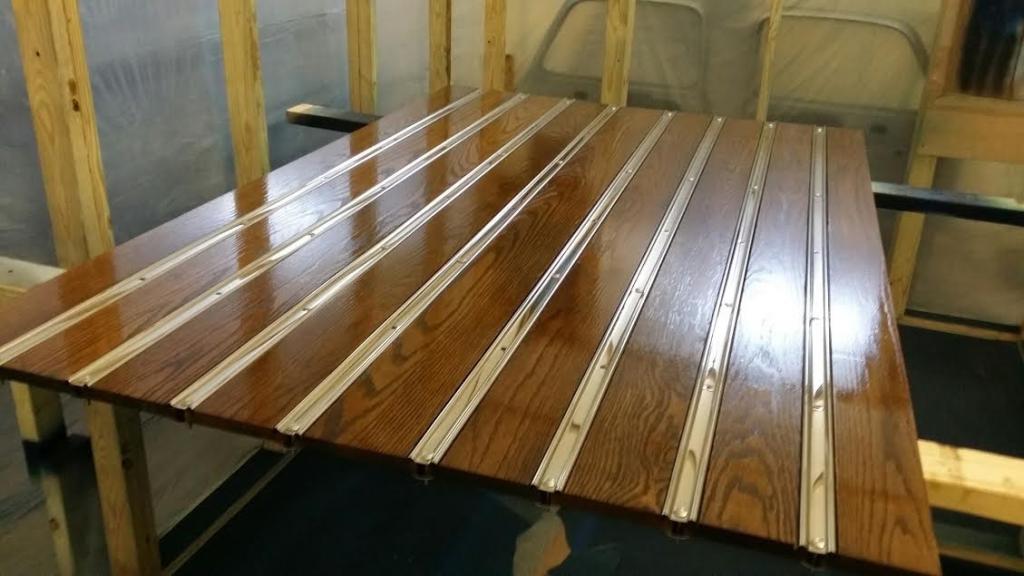
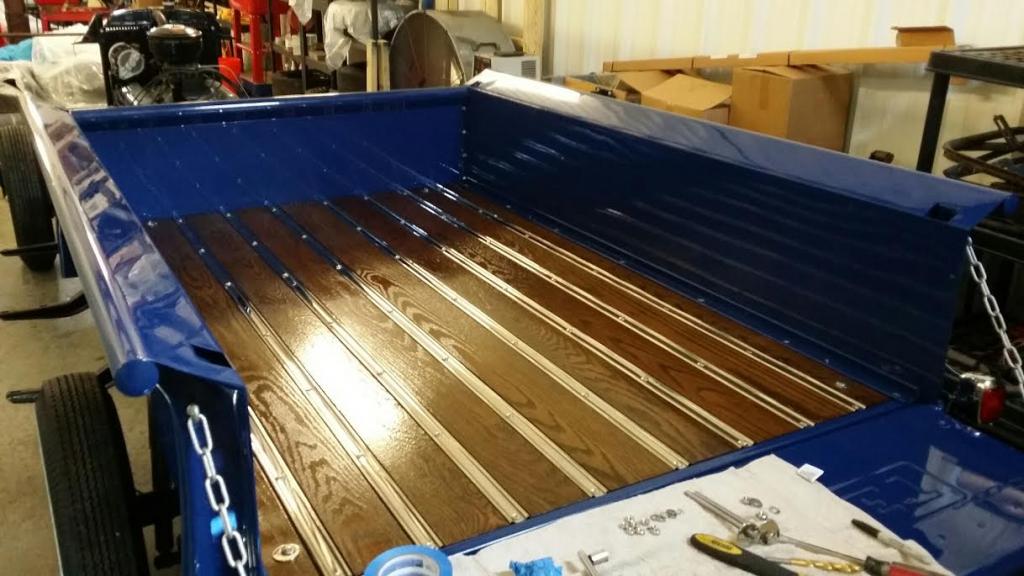
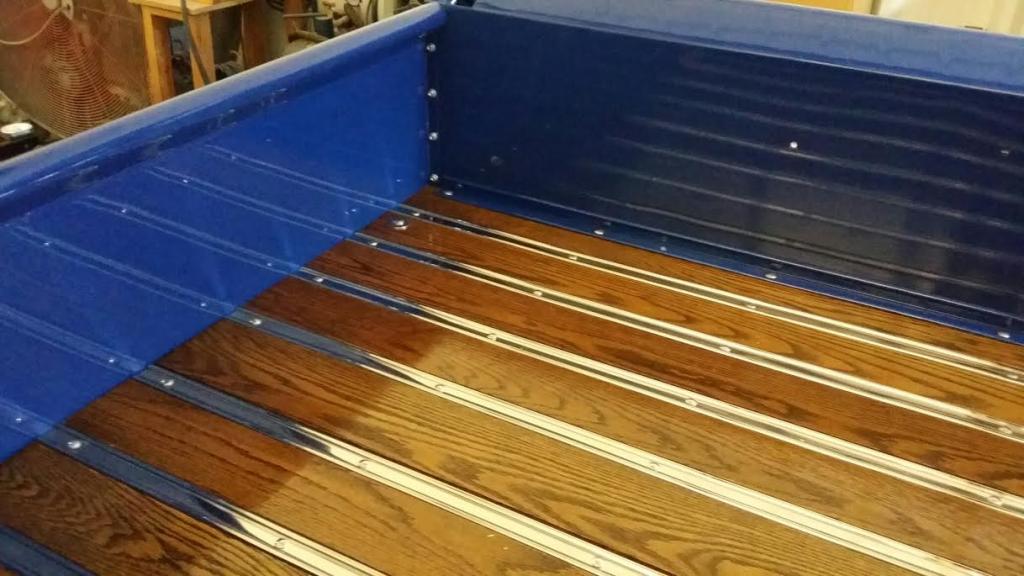
More PAINT!!!! I have all the bed pieces painted and decided to get them out of harms way, it would be best to mount them all up. So here's the bed on the truck and I couldn't be happier with how easy it went together. I used single stage paint mainly to mimic the older style finish. I sprayed it with my Devilbiss gun and it laid down extremely nice. I stained the wood to the bed and have an idea for a nice set of bed stakkes and rails to put on after the cab is mounted. The wood is protected by three heavy coats of Marine Spar Varnish. And a good shot of the engine finally done. I used decals from various years to get the appearance I was after. I used GMC Workmaster V8 valve cover decals too! Corbin spring clips, metal advance/choke line, glass bowl fuel filter, and the transmission I decided to paint flat black to make it appear at first glance as the old clunky, cast iron three-speed. All to look like a factory installation. No screw clips, Pertronix chrome coil, chrome traingular Edelbrock air filter. Just two more spark plug seperators to mount and then this is done. The Generator is actually a Power Master alternator disguised as a generator. I even added the tags. The whole harness inside the engine bay will be wrapped in the old tyme style asphalt coated cloth like the original had. So you won't see "L Park Light....L Park Light....L Park Light....." every three inches! [img]<<GRAEMLIN_URL>>/grin.gif[/img] In the front of the radiator is the trans cooler and an additional cooling fan. This will all be hidden by the front grille apron and grille. You'll never see it! This is where I stand now on the truck. I'll update here once a month from now on. My target completion time is at the end of ther year and I want to have the truck done for the Autorama in Dallas in February. Should have it done with no problem, but I'm pretty sure something will go wrong along the way. How's about them negative waves, Moriarity!!!
|
|
#15
07-31-2015, 03:28 PM
|
||||
|
||||
|
Looking good Dave. Your writing makes me feel like I'm right there busting my knuckles with you. Love the progress. It's going to be a cool ride.
Phil Woj.
|
|
#17
07-31-2015, 09:52 PM
|
||||
|
||||
|
Absolutely love it Dave. I have built a couple of "what ifs" and they are a lot of fun. Thanks for letting us enjoy.
__________________
Rick Nelson Musclecar Restoration and Design, Inc (retired) www.musclecarrestorationanddesign.com https://www.youtube.com/watch?v=62r-6vgk2_8 specialized in (only real) LS6 Chevelle restorations
|
|
#18
08-13-2015, 08:43 PM
|
||||
|
||||
|
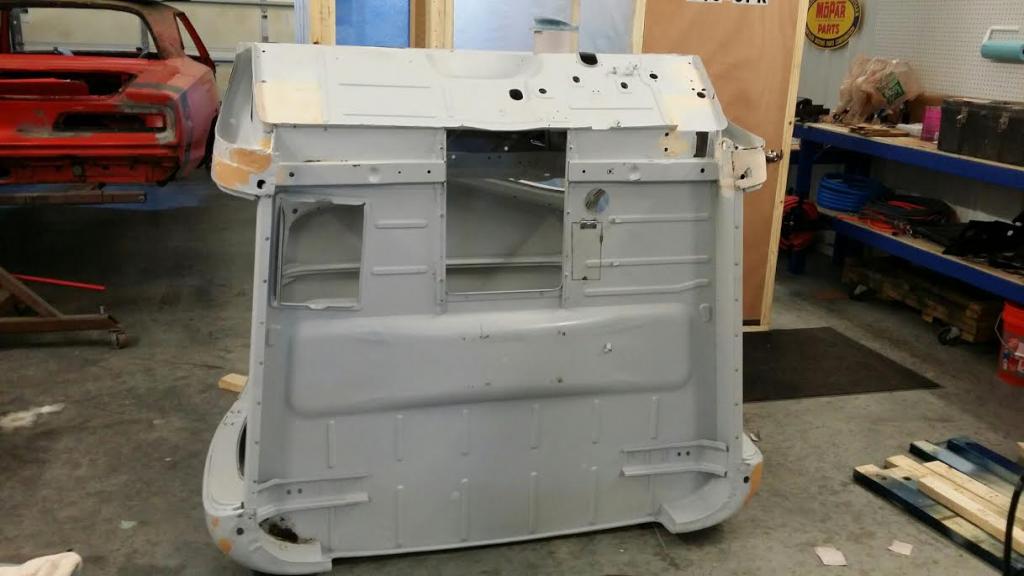
Thanks Guys!!! I appreciate the feedback. Pretty fun little build. So, back from a trip (or two) and got the bed all squared away. Next up will be the cab. I already did the metal work, so now it's onto the bodywork. Mainly filling in welding grinds and pitted metal for a smooth finish on the floors. By far the most aggravating, time consuming, and rewarding part of the job. I know one thing. After this (and then the Super Bee) I'm going to market my new exercise invention for all the daytime moms out there. It's going to be a series of sanding blocks of various lengths and continuous 80 to 400 grit. I can see it now..."Girls, are you flabby? Tired of your man looking at all the toned up, non-dusty women out there? Then grab Dave's Wonder Bars and get to work! Start out with the "sculptor" attachment (...that would be 80 grit) and then when you've attained the look you want, tone it up with the "ripper" attachment (...400 grit) and just let those reps start a flyin'!!! You'll be dusty and tone all at the same time! [img]<<GRAEMLIN_URL>>/biggthumpup.gif[/img] " Doomed to failure? I submit to you the Shake Weight...yuh huh, 'nough said.... [img]<<GRAEMLIN_URL>>/wink.gif[/img]
|
|
#19
08-13-2015, 08:50 PM
|
||||
|
||||
|
The little trap door to the right of the transmission tunnel hatch is a little access door for the new master cylinder. The black part on the lower side of the cab corner is scraped off undercoating that the blaster didn't remove, so I'll need to prime that. I am planning on using tinted bedliner on the underside and inside the fenders for durability and looks. Yeah, it's not 100% stock, but I think it'll be a nice addition. Hope to have this painted this month! More to come..
Cheers [img]<<GRAEMLIN_URL>>/beers.gif[/img] Dave
|
|
| Thread Tools | |
| Display Modes | |
|
|


 Linear Mode

