
Dedicated to the Promotion and Preservation of American Muscle Cars, Dealer built Supercars and COPO cars. |
|
#31
 07-12-2014, 06:46 PM
|
||||
|
||||
|
Here's the finished product. After scrubbing all the seats and applying leather preservative, my son and I spent the afternoon reinstalling it all. The car actually smells nice now. No more smoke residue.
 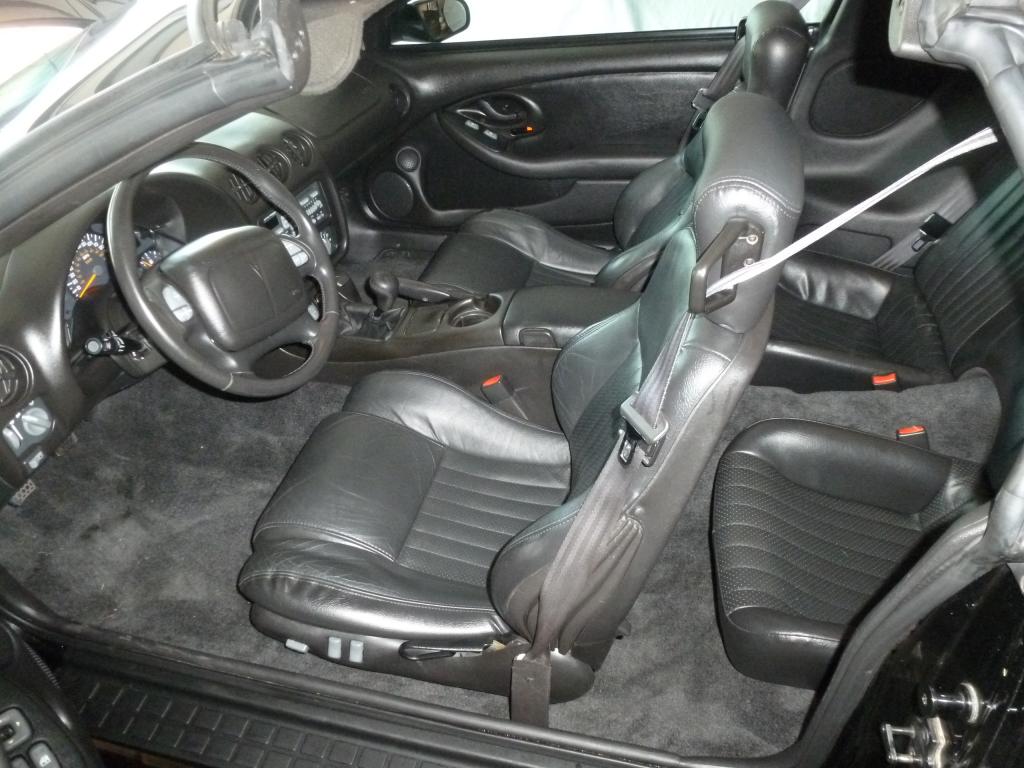 I was able to salvage the cracked polypropylene seat bolster by using the plastic welder and extra polypropylene welding rods. The repair is underneath and on the back side so it is invisible unless you remove the seats. I also used some flexible bumper repair material, supported by wire mesh, along with a couple zip-ties, to the pull the two large cracks together on the driver's door panel and then permanently repair the cracks. There is still a visible repair spot but not nearly as visible as the original 1/16" fractures. We pulled the passenger side panel to reconnoiter the condition and found one tiny crack about to start in the same locations - the 90 degree angles that are cut into the panel where the inner weatherstrip attaches. We removed the factory staples, reinstalled new staples in a non-stressed locations and then used the flexible bumper repair material to form a layer of internal bracing to the area. All is well now, until we can find a nice unbroken (and inexpensive) driver's side panel. 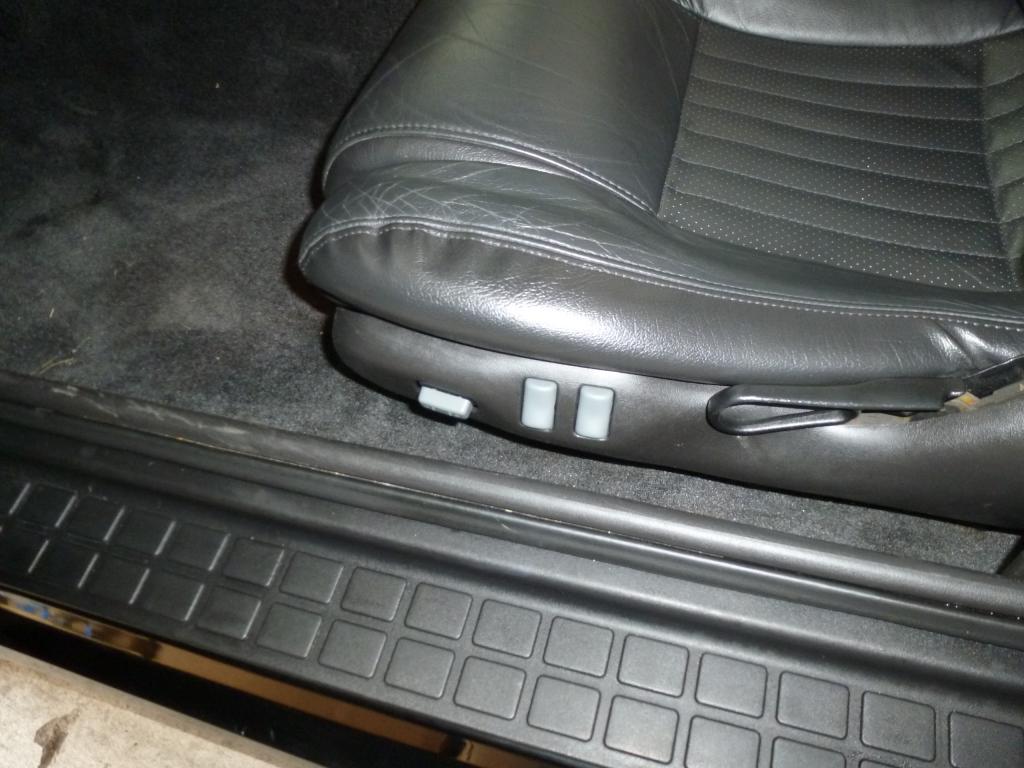 
|
|
#32
07-12-2014, 11:37 PM
|
||||
|
||||
|
We went out to the local cruise night tonight and the Firebird and Camaro just so happened to be tonight's featured car. There were several dozen first, second, third, and fourth gen Firebirds there. Another black WS6 pulled in and parked next to me right after this photo was taken. (It was an 2002 with an automatic...and a baby seat in the back.)

|
|
#33
07-15-2014, 06:10 PM
|
|||
|
|||
|
I dont if you've looked at LS1Tech they have a good board to hunt for parts like the License plate cover. I have a 99 Trans Am and its a great place to figure out the electrical issues these cars are plagued with (you'll see [img]<<GRAEMLIN_URL>>/smile.gif[/img] ) My car has same roof issue as yours does, the soultion is buy a repop piece 6-700$ or find a 93-97 doner and carefully remove it and paint install the earler cars were not effected like the 98 and newer ones like ours. I cut one off at boneyard for 50$ - thats as far as I have gotten but I have more time than the funds and my car isnt so bad yet. do some searching in LS1Tech
<div class="ubbcode-block"><div class="ubbcode-header">Originally Posted By: njsteve</div><div class="ubbcode-body">  </div></div>
__________________
69 RS/Z 302 VE3 Daytona 69 Chevelle SS 396 375 69 T/A clone LS6/6 speed 90 Formula 350
|
|
#34
07-15-2014, 08:40 PM
|
||||
|
||||
|
Already been over there and started a sister thread to this one. [img]<<GRAEMLIN_URL>>/biggthumpup.gif[/img]
Just picked this up today off of a 1997 Firebird in a local salvage yard. If the paint was a little bit better I could have used it as is, but the clear coat is crackling from sitting out so long. Now comes the fun part of carefully removing it from the steel frame. What method did you use? Piano wire or a heated knife? BTW, what is the small triangular trim piece by the lower edge, held on with? 
|
|
#35
07-19-2014, 12:10 AM
|
||||
|
||||
|
Well it took two days but we got the panel detached from the steel frame. First we had to use a sawzall and disc grinder to cut away the edges of the steel to allow a straight shot under the plastic panel. Then came the heat gun heating the steel to the point where it allowed an old butchers knife to slide in between the panel and the steel frame. On the middle areas where the plastic panel curves over the edge of the steel we used the windshield removal tool: a wire with two handles, to slide-cut the adhesive once the steel was hot enough to release it. The heat makes all the difference. Without it you could be there for a week with that windshield tool sawing away..
Here is the final result:  
|
|
#36
07-19-2014, 05:19 AM
|
|||
|
|||
|
Well done boys!
Jason
|
|
#37
07-19-2014, 03:26 PM
|
||||
|
||||
|
Went to my buddy's garage this morning and installed the skip-shift eliminator harness. It is a $10 plug-in that goes between the solenoid on the transmission and the harness that leads to the solenoid. Got rid of that annoying 1st to 4th gear, mandatory shifting. While we were under there, we checked to diff and trans oil levels. The boy is getting better with his wrenching, though he still thinks that everything has to be mega-tightened. Not with a drain plug, my boy! [img]<<GRAEMLIN_URL>>/scholar.gif[/img]
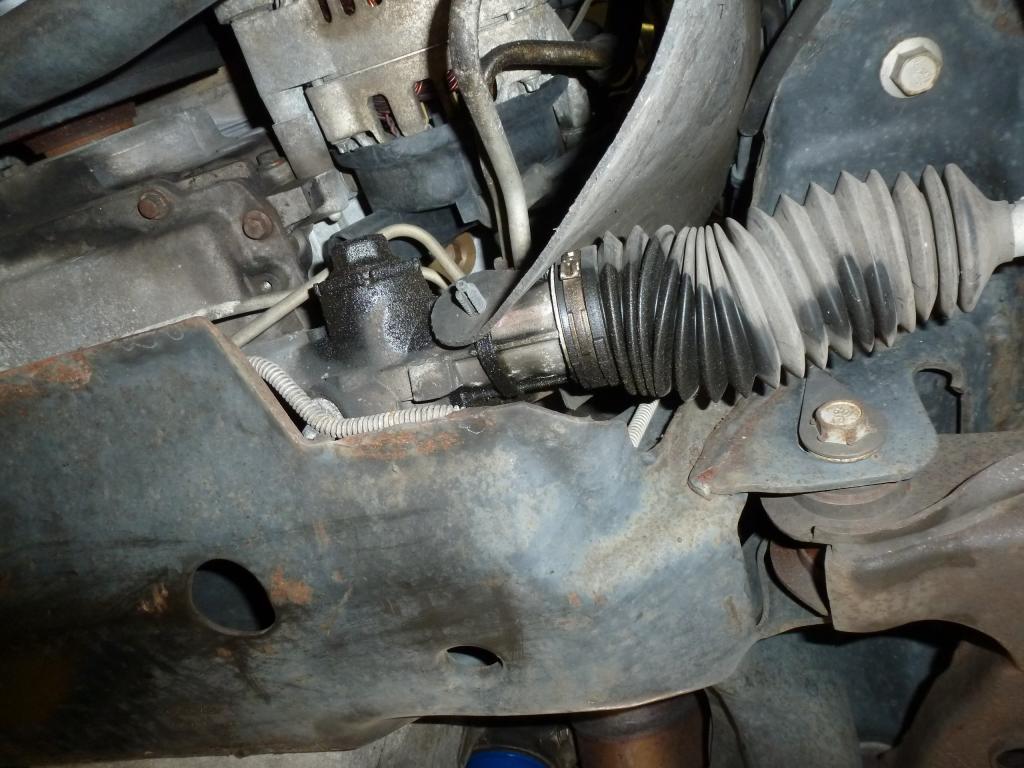
Took some underbody photos after we wiped down the rear diff oil spray residue from prior to the diff being rebuilt last year by the dealer. Here it is.  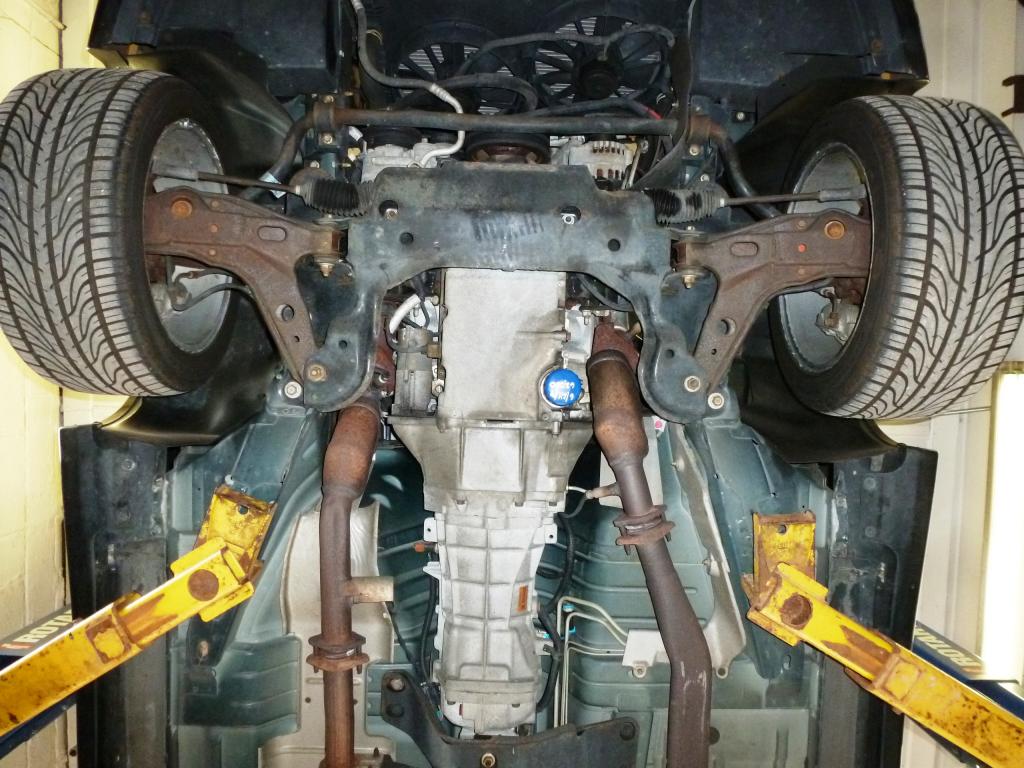  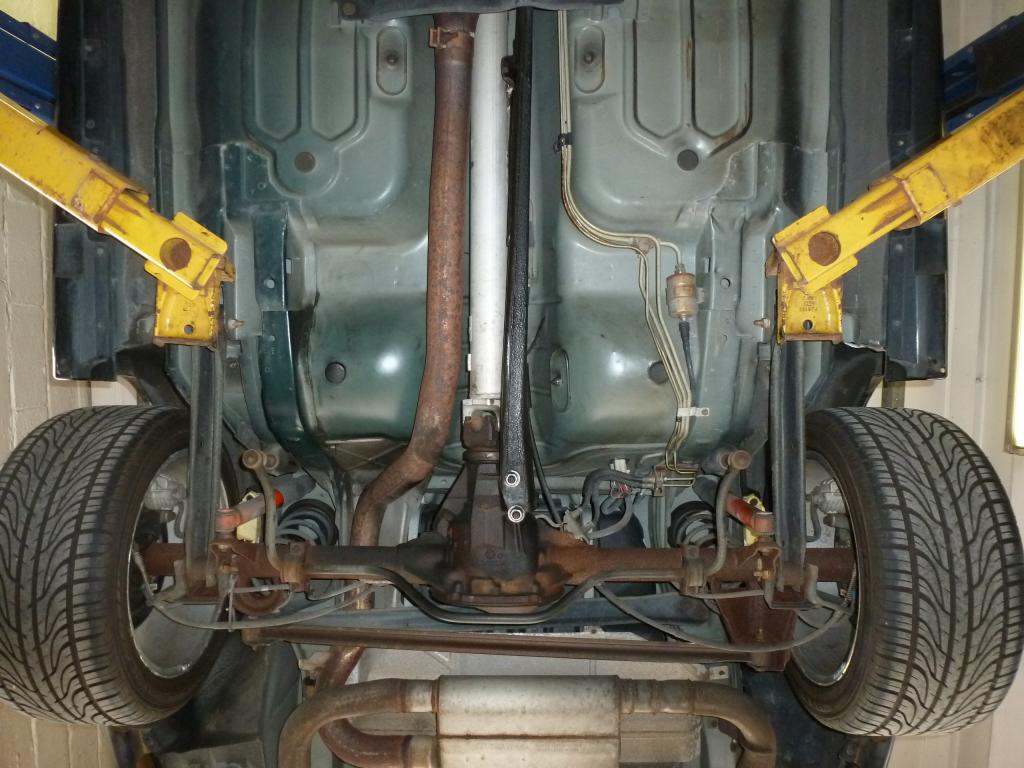 
|
|
#38
07-19-2014, 03:31 PM
|
||||
|
||||
|
And noticed that the steering rack and the power steering pump were leaking. Gotta love that extended warranty! I'm going to call the dealer on Monday to get them replaced. ($50 warranty co-pay).
|
|
#39
07-20-2014, 10:22 AM
|
||||
|
||||
|
I would push to put hoses in too. As a rule, when both are leaking............there is an issue with one of the hoses that causes the system to over pressurize. FWIW
Tim
|
|
#40
08-12-2014, 12:29 PM
|
||||
|
||||
|
Update on the steering rack: I brought it to the local GM dealer. The extended warranty covered most of it. Those warranty companies sure do nickle and dime the dealership to death. The service manager is very familiar with these warranty companies: he told me that they put you on hold for 20-30 minutes any time you call and don't pay the full repair rate and try to get you to put used parts on. They do this just to get you to give up on a claim. He was right. I was there when he was simply trying to get an update on authorizing a part and I could overhear the aggravation he was going through.
Since it is a GM dealer they wouldn't guarantee the work (only the labor) unless they installed Delco parts. The warranty company finally agreed to using Delco parts. The rack was a Delco unit ordered by the dealer. The power steering pump was a Delco unit provided by the warranty company after they balked at the high dealer price. The warranty didn't cover the pressure hose, so I got a new Delco hose from rockauto for $25. The warranty company didn't pay for the alignment and their labor rate was $10 less an hour than the dealer so I owed that difference. And there was a $50 deductible on the warranty policy. So in the end, for a $1,100 repair bill, I paid $225.
|
 |
|
|


 Linear Mode

