
|
|
|
|||||||
| Register | Album Gallery | Thread Gallery | FAQ | Community | Calendar | Become a Paid Member | Today's Posts | Search |


|
|
|
Thread Tools | Display Modes |
|
#863
 12-07-2020, 08:34 PM
|
||||
|
||||
|
Thanks!
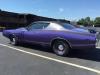
I just finished up getting the bottom spoke of the steering wheel in the correct six o'clock position and setting the toe....17 times. How do I know it was 17 times? The road I use to test the wheel position and jounce the suspension is exactly 1/2 mile up and a 1/2 mile back. And the odometer is 17 miles higher now. This took about six hours to get it perfect. I'm exhausted. I did notice that the transmission pops out of first and second gear under coast condtions so I am assuming it needs synchros. It's the original born-with transmission. Dave told me it probably needs some freshening up. So this winter I will probably pull it and bring it to the Lee Myles shop in Union NJ, that has done my other transmissions. Last edited by njsteve; 12-08-2020 at 11:45 AM. 
|
| The Following 2 Users Say Thank You to njsteve For This Useful Post: | ||
427TJ (12-08-2020), cruiserofland (12-07-2020) | ||
|
#864
12-08-2020, 09:32 PM
|
||||
|
||||
|
I got something done today!
I was under the dash, cursing and bending and getting stuck trying to install the repaired speedometer cable. The original had the little white tab broken off, where it engages the back of the speedometer. So I was all ready to install the new one and had the old one half fed over the clutch/brake pedal bracketry when I noticed that the ferrule that attaches to the transmission on the new cable was several sizes too small. The factory used a 1" nut to attach the cable end to the tail shaft. The replacement had a 3/4" round ferrule. So I ended up pulling the white plastic ends off of both the original and the new cable, and swapping them. I used the heat gun to soften the old cable to allow the new white end to slide on and it seems to have worked. Well it is installed anyway, it will have to wait til tomorrow to see if the speedometer works without bouncing like before from being halfway attached but not clipped in. Oh, and did I mention that there is a firewall grommet with a 3/8" hole that the cable has to go through? Mind you, one end of the cable has the aforementioned 1" nut that certainly isn't going through the 3/8" hole and the other end is an only slight slimmer 3/4" white plastic connector. The grommet must be installed during the assembly of the cable at the factory but I ended up soaking the grommet in boiling water and then using a couple tiny screw drivers to help persuade it over the white plastic end. It worked. Yeah, I know, I should have slipped the grommet on when the white ends were off... While I was trapped under the dash and couldn't get out, I decided to make my time productive and check out why the road lamps were't working. My hunch was right - the very expensive original toggle switch was not doing anything other than making the click noise from physically moving on and off. No power was getting through. So I pulled the switch out and tested it with a ground and a test light. No test light illumination in either position. I then bent the four little tabs over and opened the back up. I found the problem. The dielectric grease had turned to fossilized amber inside and no electrons were getting through it. So I gently ran the contacts against my wire wheel, threw a couple drops of oil in there and tested it again. Eureka! I then hooked it back up and the driving lamps now work! Yay! The next project was gathering all the parts for the steering column lockout system that was unique to 1970 Mopar four-speeds, and extra unique to small block cars. When working as designed, it requires the car to be parked with the shifter in reverse, and then locks it there when the ignition key is removed. All these parts were usually tossed in the trash can the moment someone tried to install headers on a car. Luckily the car had 95% of the parts intact (Thanks Dave). The only pieces missing were a couple of plastic bushings for the cross bar and a unique double-headed shifter linkage swivel that the lockout engagement rod attaches to on the reverse lever. I actually found them both on ebay - the Hurst rebuilder guy sells the swivel and the bushing from a Mopar supplier. Here's a photo of the swivel and the linkage: Last edited by njsteve; 12-10-2020 at 11:20 PM.
|
| The Following 6 Users Say Thank You to njsteve For This Useful Post: | ||
427TJ (12-10-2020), big gear head (12-08-2020), markinnaples (12-08-2020), olredalert (12-08-2020), PeteLeathersac (12-09-2020), RPOLS3 (12-08-2020) | ||
|
#865
12-09-2020, 05:21 PM
|
||||
|
||||
|
More electrical progress. Mopars seem to be notorious for tail light issues with bad grounds. If you dont grind the heck out of the mounting area that the potmetal tail light housings mate up with, you risk intermittent light issues and backfeeding through the harness. Symptoms are cascading lights (alternating bulbs activating in a sequence) when you hit the brakes or the reverse lamps glowing dimly when the parking lights go on.
This car had no working license plate light, left rear marker light, and the dimly lit back-up lights glowing when the parking lights were on. If you use an alligator clip and wire to ground, they work fine as a test. So the choice is pulling everything apart and gouging through new paint or the logical solution of just making some small jumper ground wires. So I got some spare 16 gauge wire and eyelet ends. I ran one from the side marker housing to the tail lamp housings and then to a prexisting screw behind the trunk latch bracing. None of it is visible to the prying eye. As for the license plate light, I had to pull the small potmetal housing out, and grind the area where the socket snaps into the housing. The galvanized coating and old finish just wouldn't let the grounding work. Once I did that, we had all the lights working as they should. The crazy thing is that the factory uses a separate, designated ground wire for the headlight harness and front, grill mounted turn signals that screws to the radiator support but never bothered to do the same for the tail light harness. Next fix, is doing the same jumper wire deal for the dash housing because the instrument panel lamps seem to pop the 3-amp "LPS" fuse intermittently. Cudas and Challengers used the gauge pod mounting screws and the little metal tabs under specific screw locations to be the grounds. If one of those tabs is gone, like on the switch pod that houses the headlamp switch, you get the grounding issue problem. Last edited by njsteve; 12-09-2020 at 05:33 PM.
|
| The Following 5 Users Say Thank You to njsteve For This Useful Post: | ||
427TJ (12-09-2020), big gear head (12-09-2020), markinnaples (12-09-2020), RPOLS3 (12-09-2020), Xplantdad (12-09-2020) | ||
|
#866
12-09-2020, 08:00 PM
|
||||
|
||||
|
Back from the frozen garage. It's snowing at the moment.
It took a while, but I got the fuel sender out of the tank without having to remove the tank. First I siphoned most of the gas out. The sender on an E-body is on the drivers side of the tank but everything is in the way. I disconnected the left muffler from the hanger under the trunk (after wrapping the exhaust tip in a towel so it wouldn't scratch the valance paint). Once the muffler was hanging about an inch lower, I was able to get to the heat shield that is above it. Once that heat shield was out it gave me a couple inches of room to work alongside the tank. Using a brass drift to avoid sparks, I was able to tap the collar off the sender and then do the obligatory "bent nail puzzle" removal sequence trying to get the sender out of the tank with the exhaust still alongside it. Of course the brass float goes in the opposite direction of the pickup sock, making it an expert level puzzle scenario. Eventually I was able to finagle the thing out from there without removing the muffler or the tank. And as you may recall from previous episodes, the tank can't come out without removing the rear vlance which in no way shape or form or coming off that car without scratching all sorts of other painted parts. Once I got it out, I tested the original 1970 sender and as predicted, it is inert. So the removal was necessary. Installing the new sender was just as much fun to maneuver back into the tank with the adjacent muffler in place. I got the sender lead back on, along with the ground strap and low and behold, it actually worked! I put all the gas back in and she now reads 3/4 full. That's all for today from snowy Joysey. Last edited by njsteve; 12-09-2020 at 08:06 PM.
|
| The Following 3 Users Say Thank You to njsteve For This Useful Post: | ||
|
#867
12-09-2020, 08:17 PM
|
|||
|
|||
|
I can relate to this: "While I was trapped under the dash and couldn't get out,..."
Sometimes I think I am going to have to wait for Sherri to come retrieve me. Kind of like: "I've fallen and I can't get up."
__________________
Don't believe everything you read on the internet ... Ben Franklin
|
|
#868
12-09-2020, 09:05 PM
|
|||
|
|||
|
Quote:
|
|
#869
12-09-2020, 11:15 PM
|
||||
|
||||
|
Add roll bars to that situation and then you know how I feel when I have to get under my dash. Seat removal is required for anything more than a fuse change.
__________________
Freddie 1969 Camaro RS/SS396 (427) 4 speed
|
|
#870
12-09-2020, 11:59 PM
|
||||
|
||||
|
Quote:
|
| The Following User Says Thank You to napa68 For This Useful Post: | ||
olredalert (12-10-2020) | ||
|
|
|


 Linear Mode

